After building the Westfalia, I wanted to practice on a couple of models. When I was younger, I would build airplanes and generally not cars. I mostly followed the kits without deviating too much. I bought an airbrush near the end of the Westy, and I made some mistakes when I was using it to paint the roof. Mainly, I held the brush too far from the Westy so that the spray dried before it hit the surface. This created a strange texture on the surface, like sand-paper (but it was kind of cool – the longer I sprayed, the taller these weird structures on the surface grew). So the goal with the practice kits was to practice air-brushing, and tryout some techniques that I hadn’t tried before on some models that I didn’t really care about too much.
The intent was to pick up one cheap (~$30) kit off amazon of a Beetle and a model Porsche. I accidentally ordered 2 beetles, so even more practice!
The kit for the 2 bugs Is a pretty simple kit. It’s mainly intended to be click-together. Kind of a starter kit. It’s probably what I should have started with rather than the Westy, but whatevs.
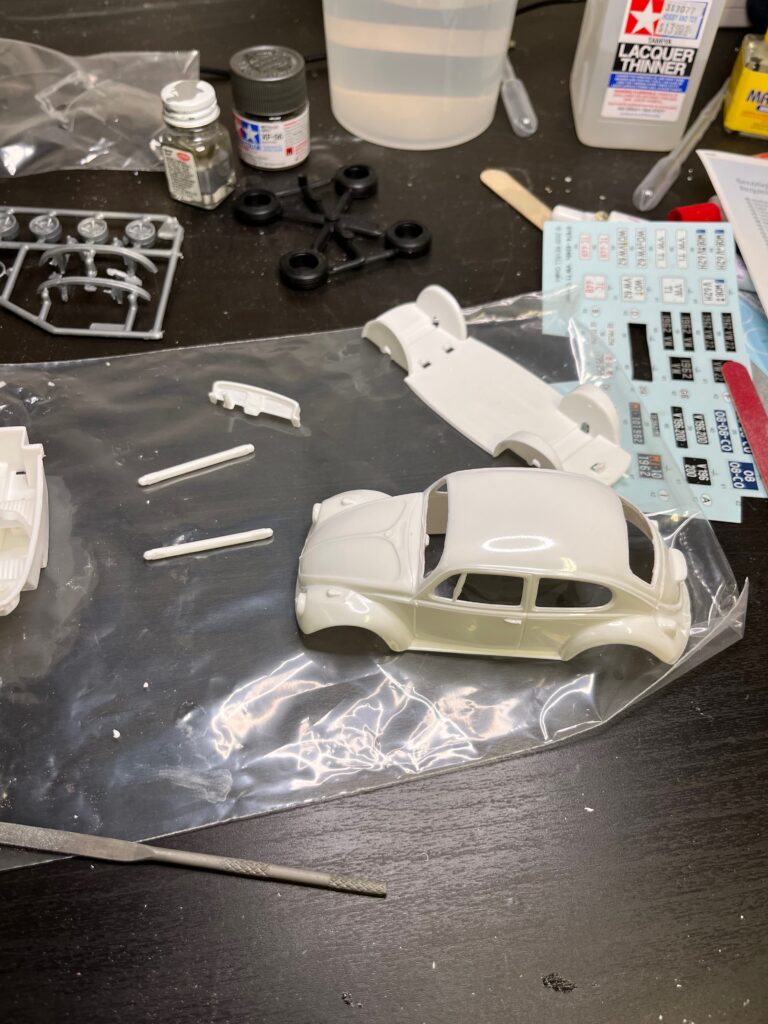
I think this is a fairly old kit. It required a lot of clean-up of flash around the edges, and some of the lines, particularly around the windows weren’t great. Still, it was perfect for my purposes.
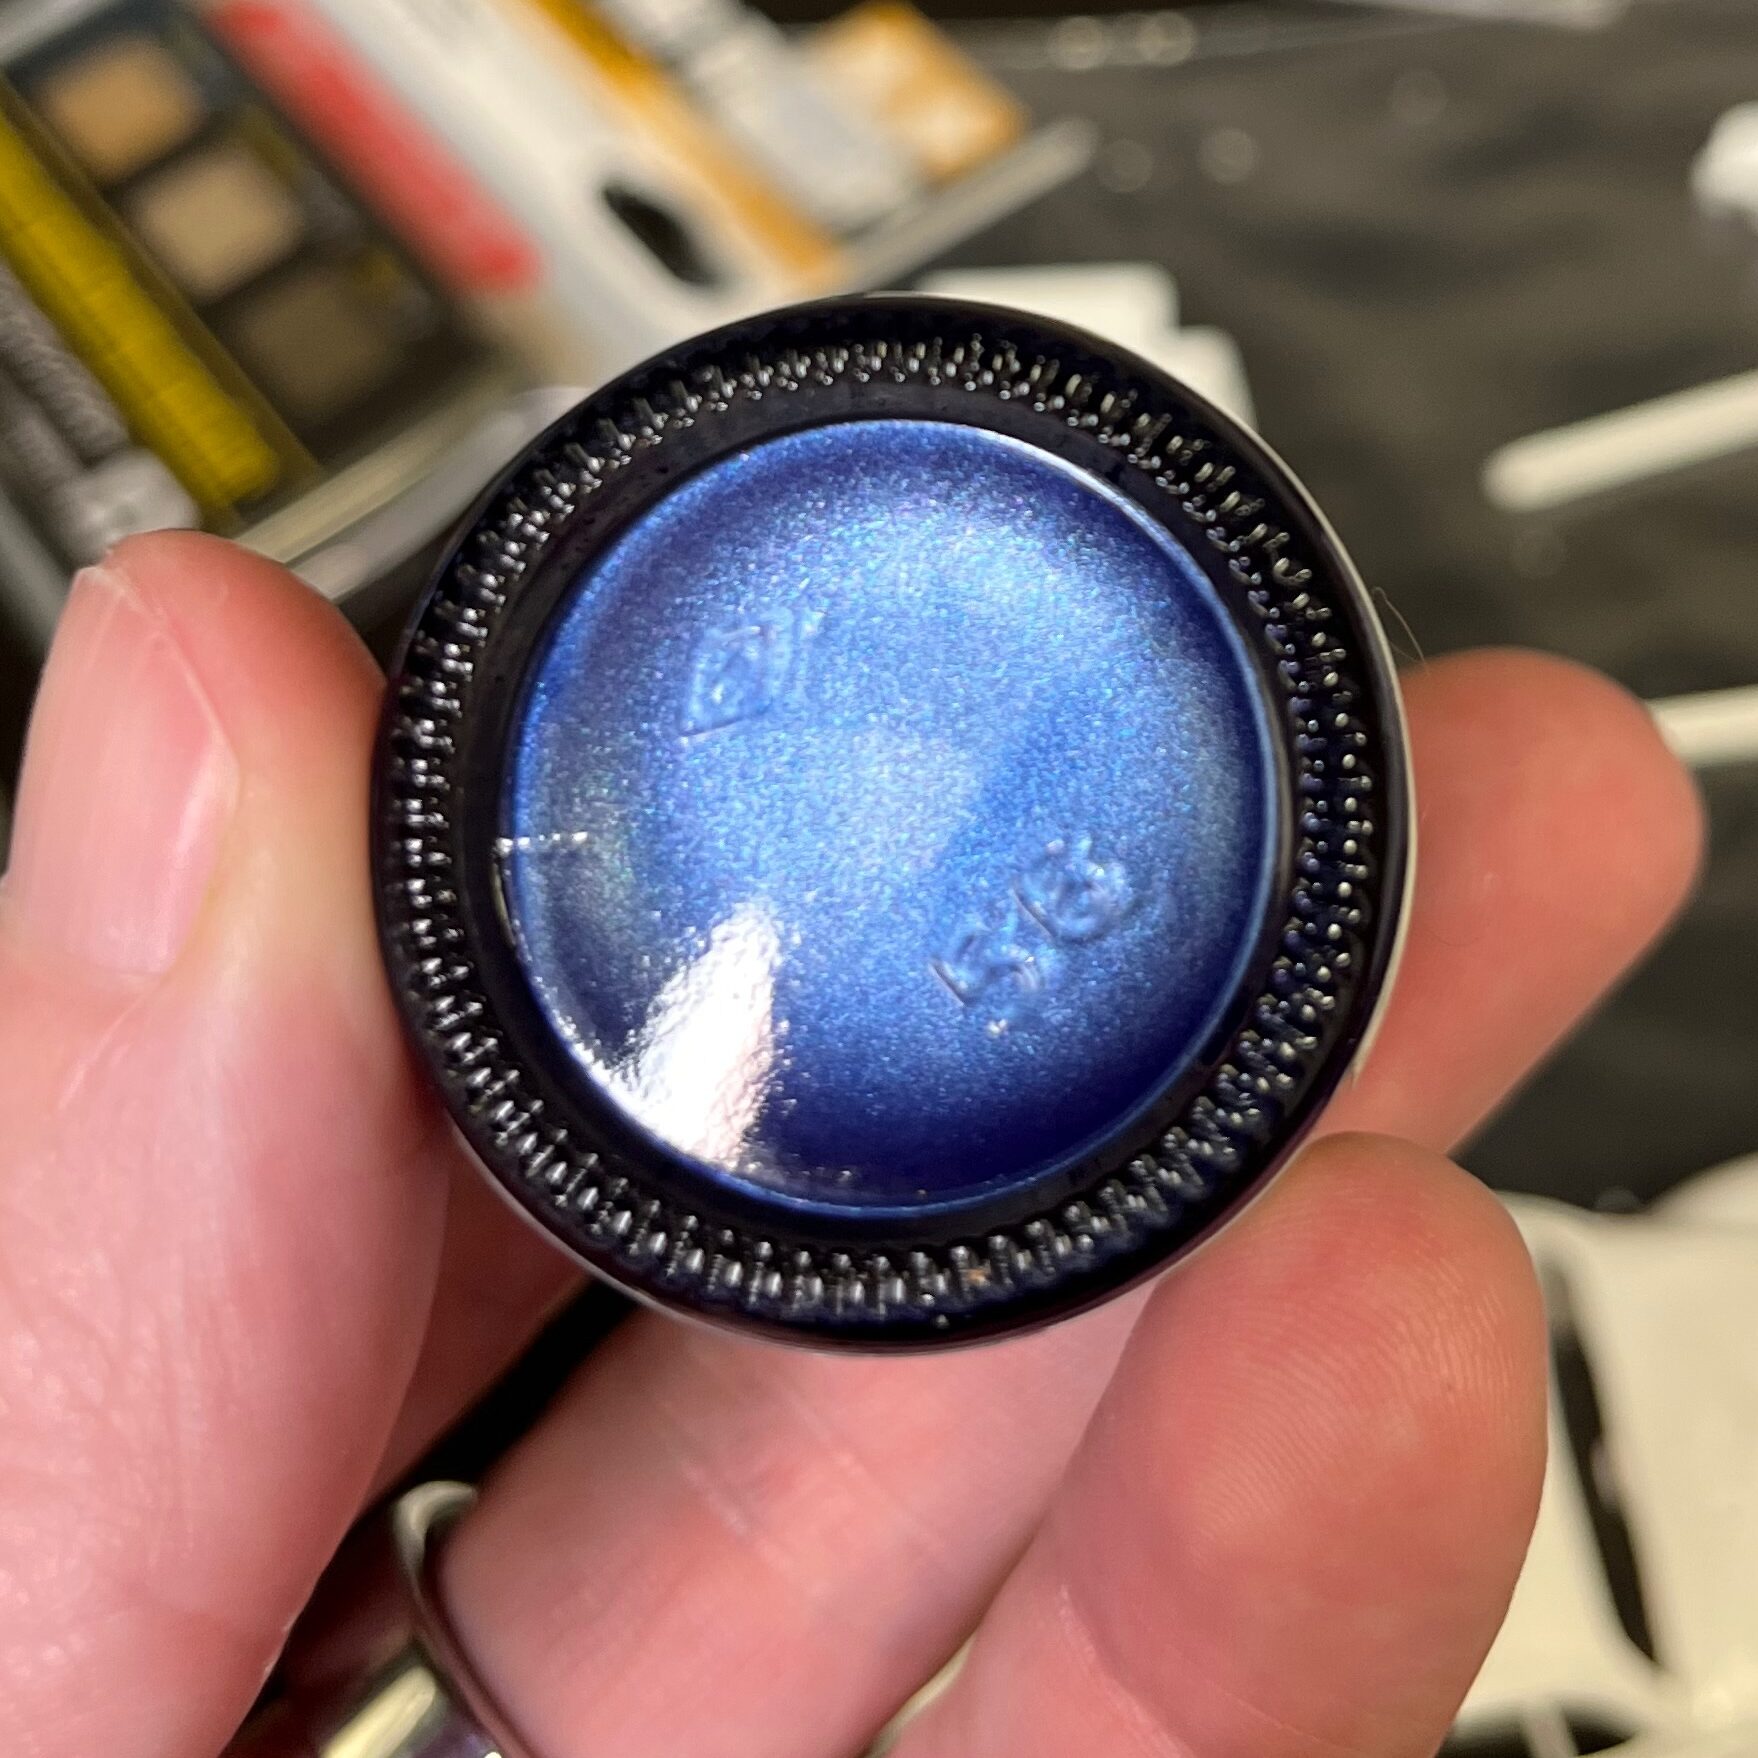
I used this Tamiya metallic blue lacquer paint for the base colour.
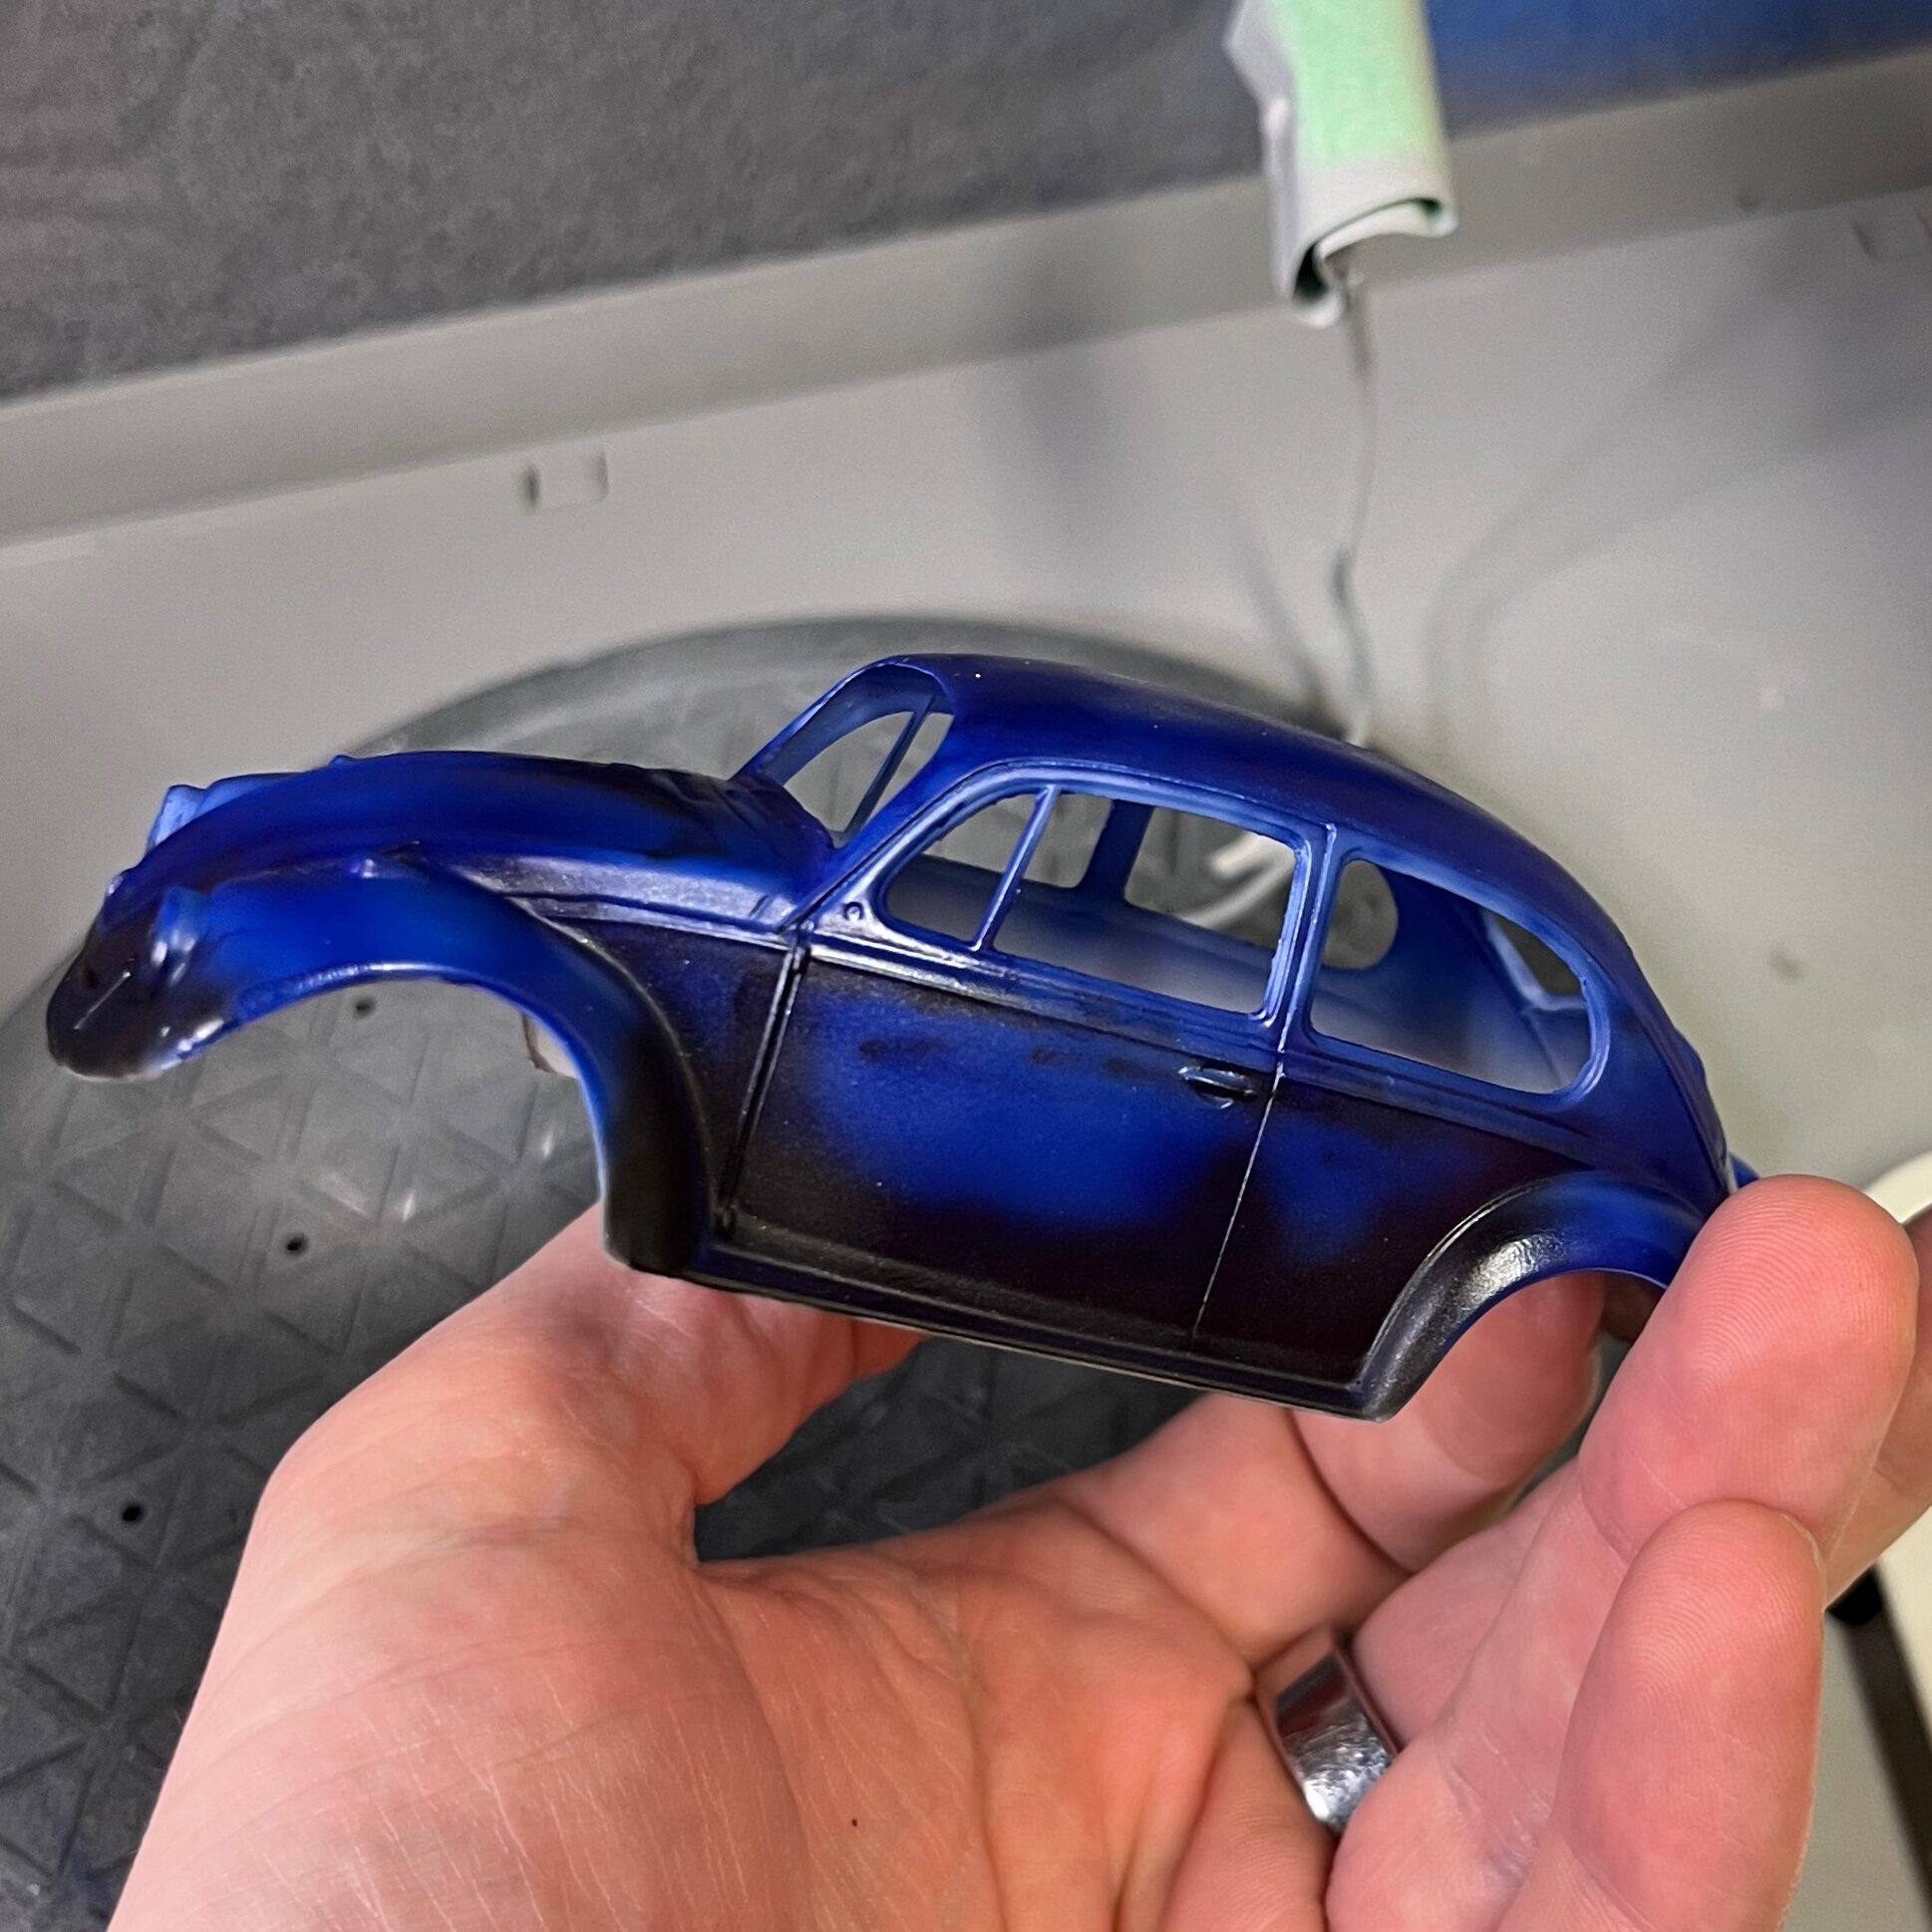
I started with a grey primer, and then used a flat black to provide some pre-shading. What I’ve heard is that the pre-shading is a bit transparent and gives a subtle shaded look. This is one of the experiments that I was trying on this kit. As you can see from the photo, I wasn’t kidding that Ineeded practice.

The shading was decided not subtle! This may be because I’m using a metallic colour (which my artist significant other advises are somewhat transparent). In any event, it took several coats before that black was more subtle than not.
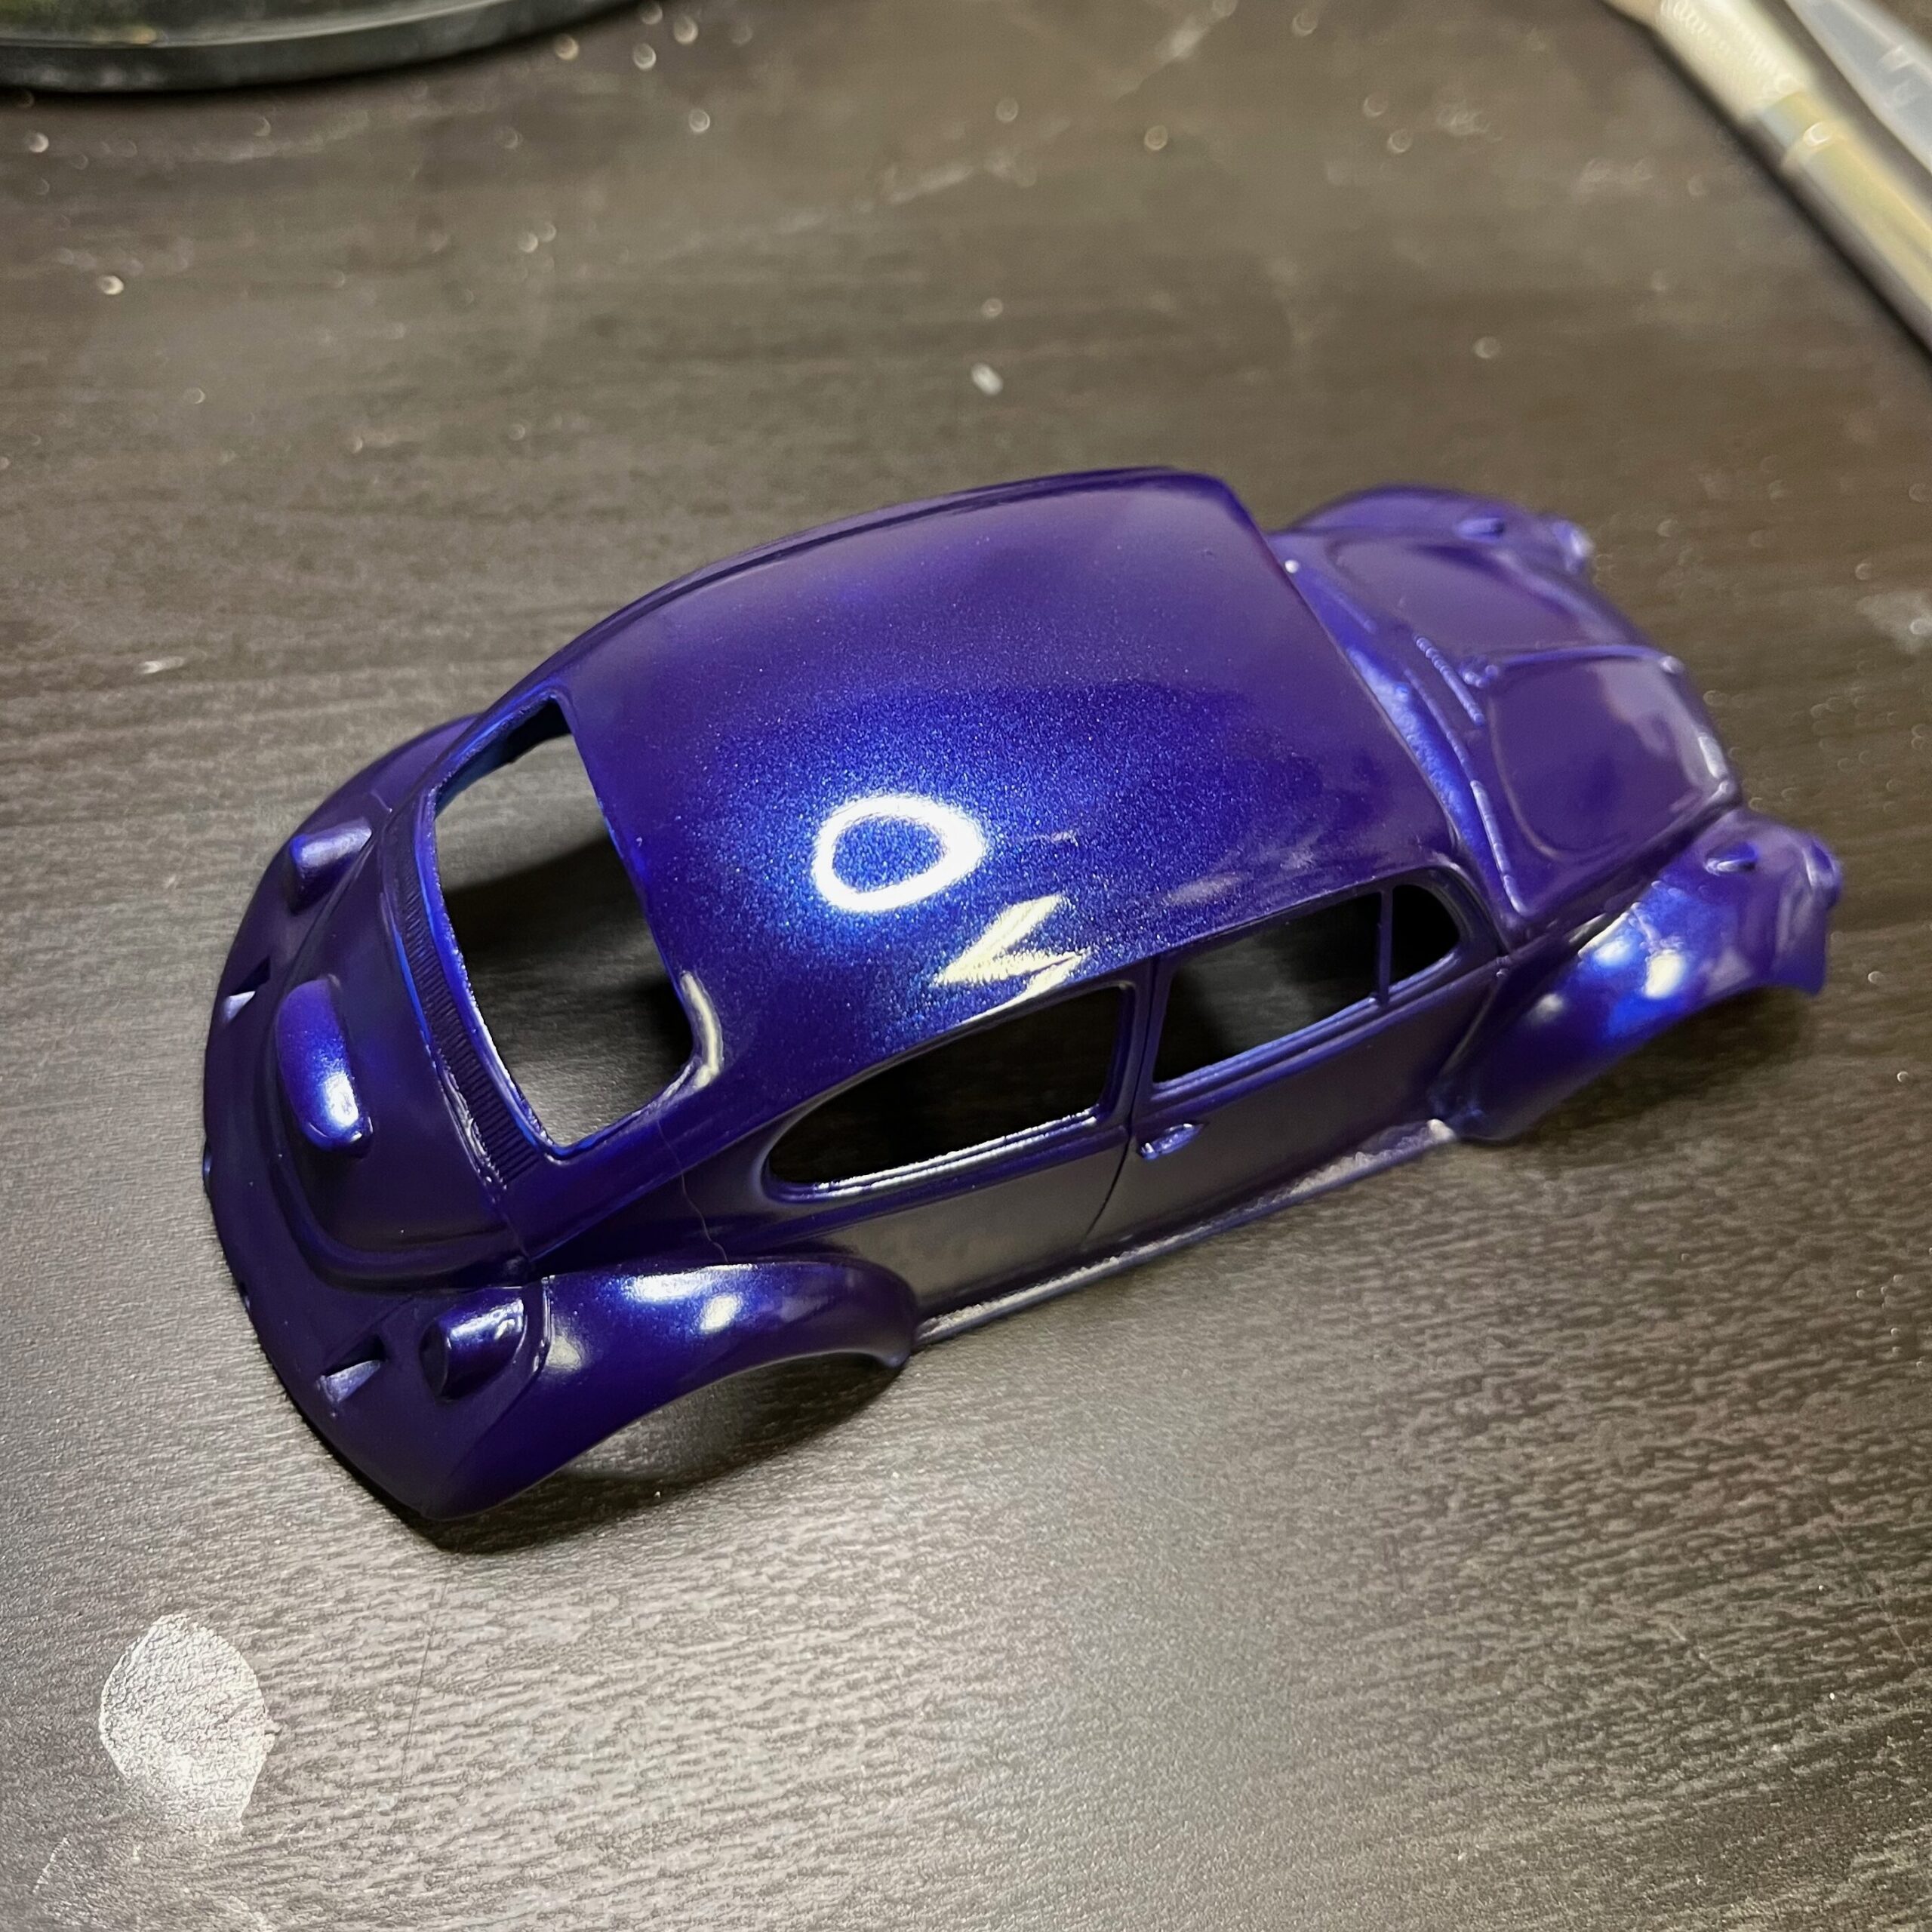
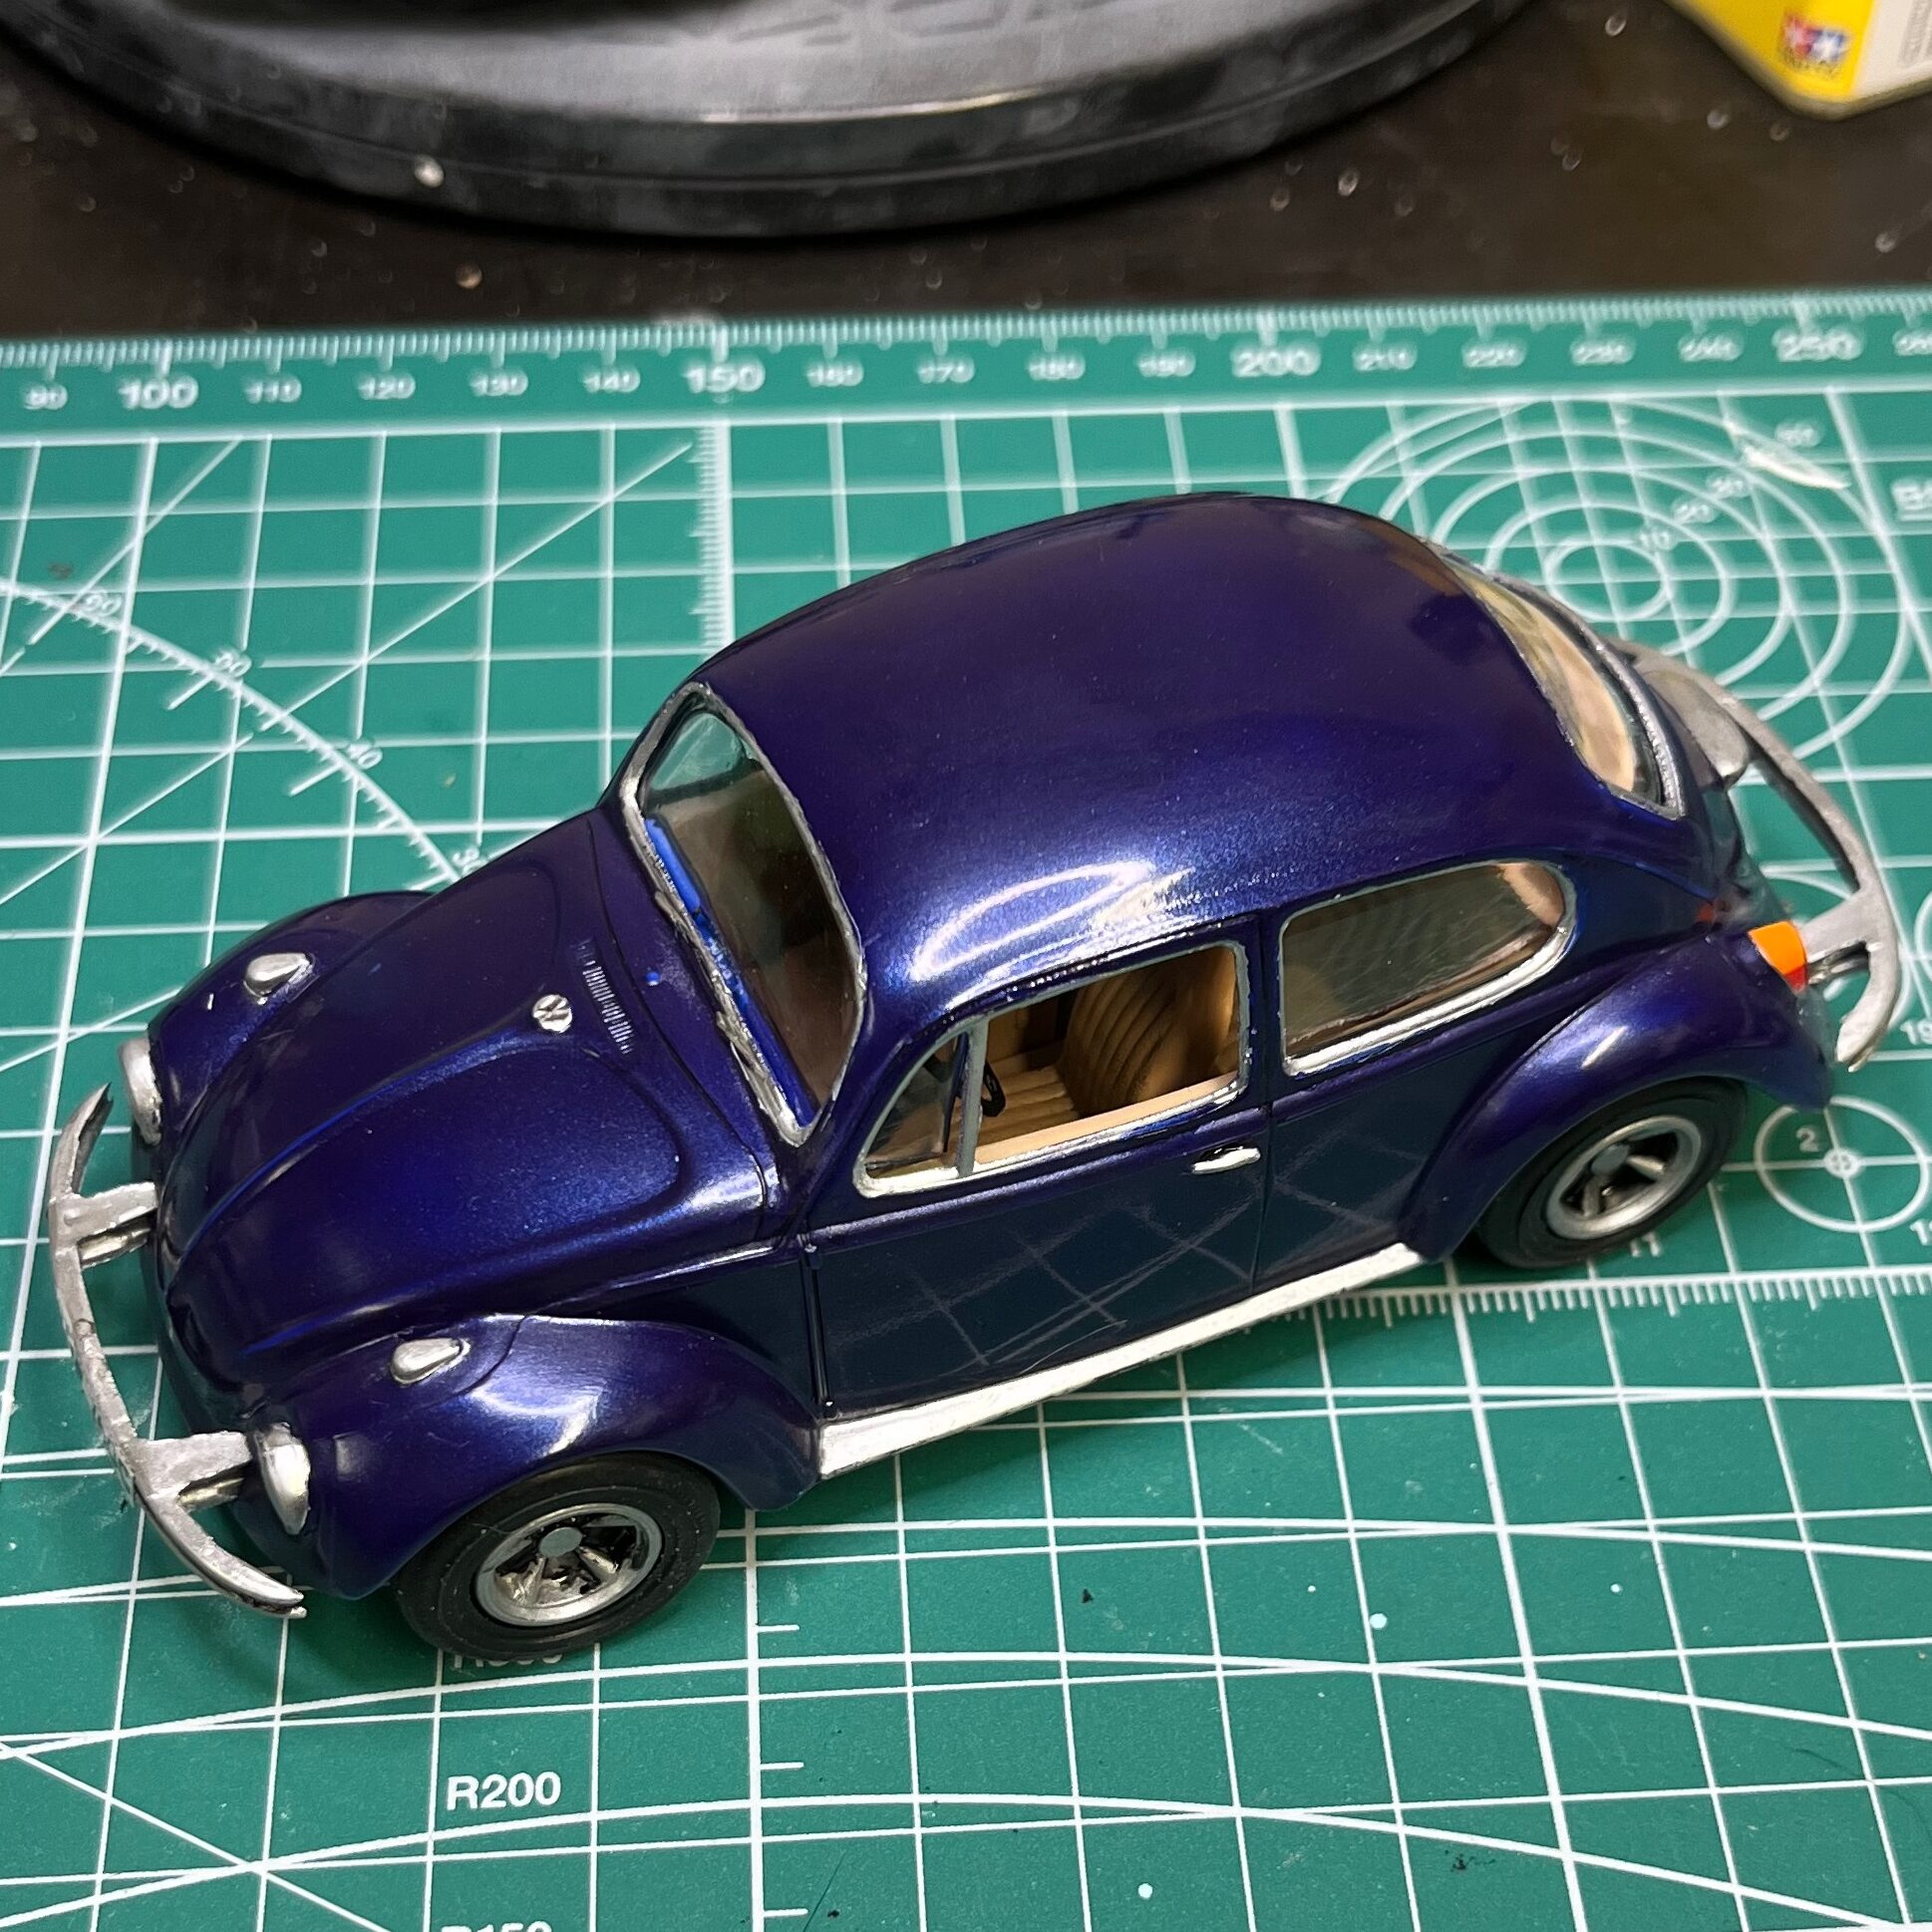
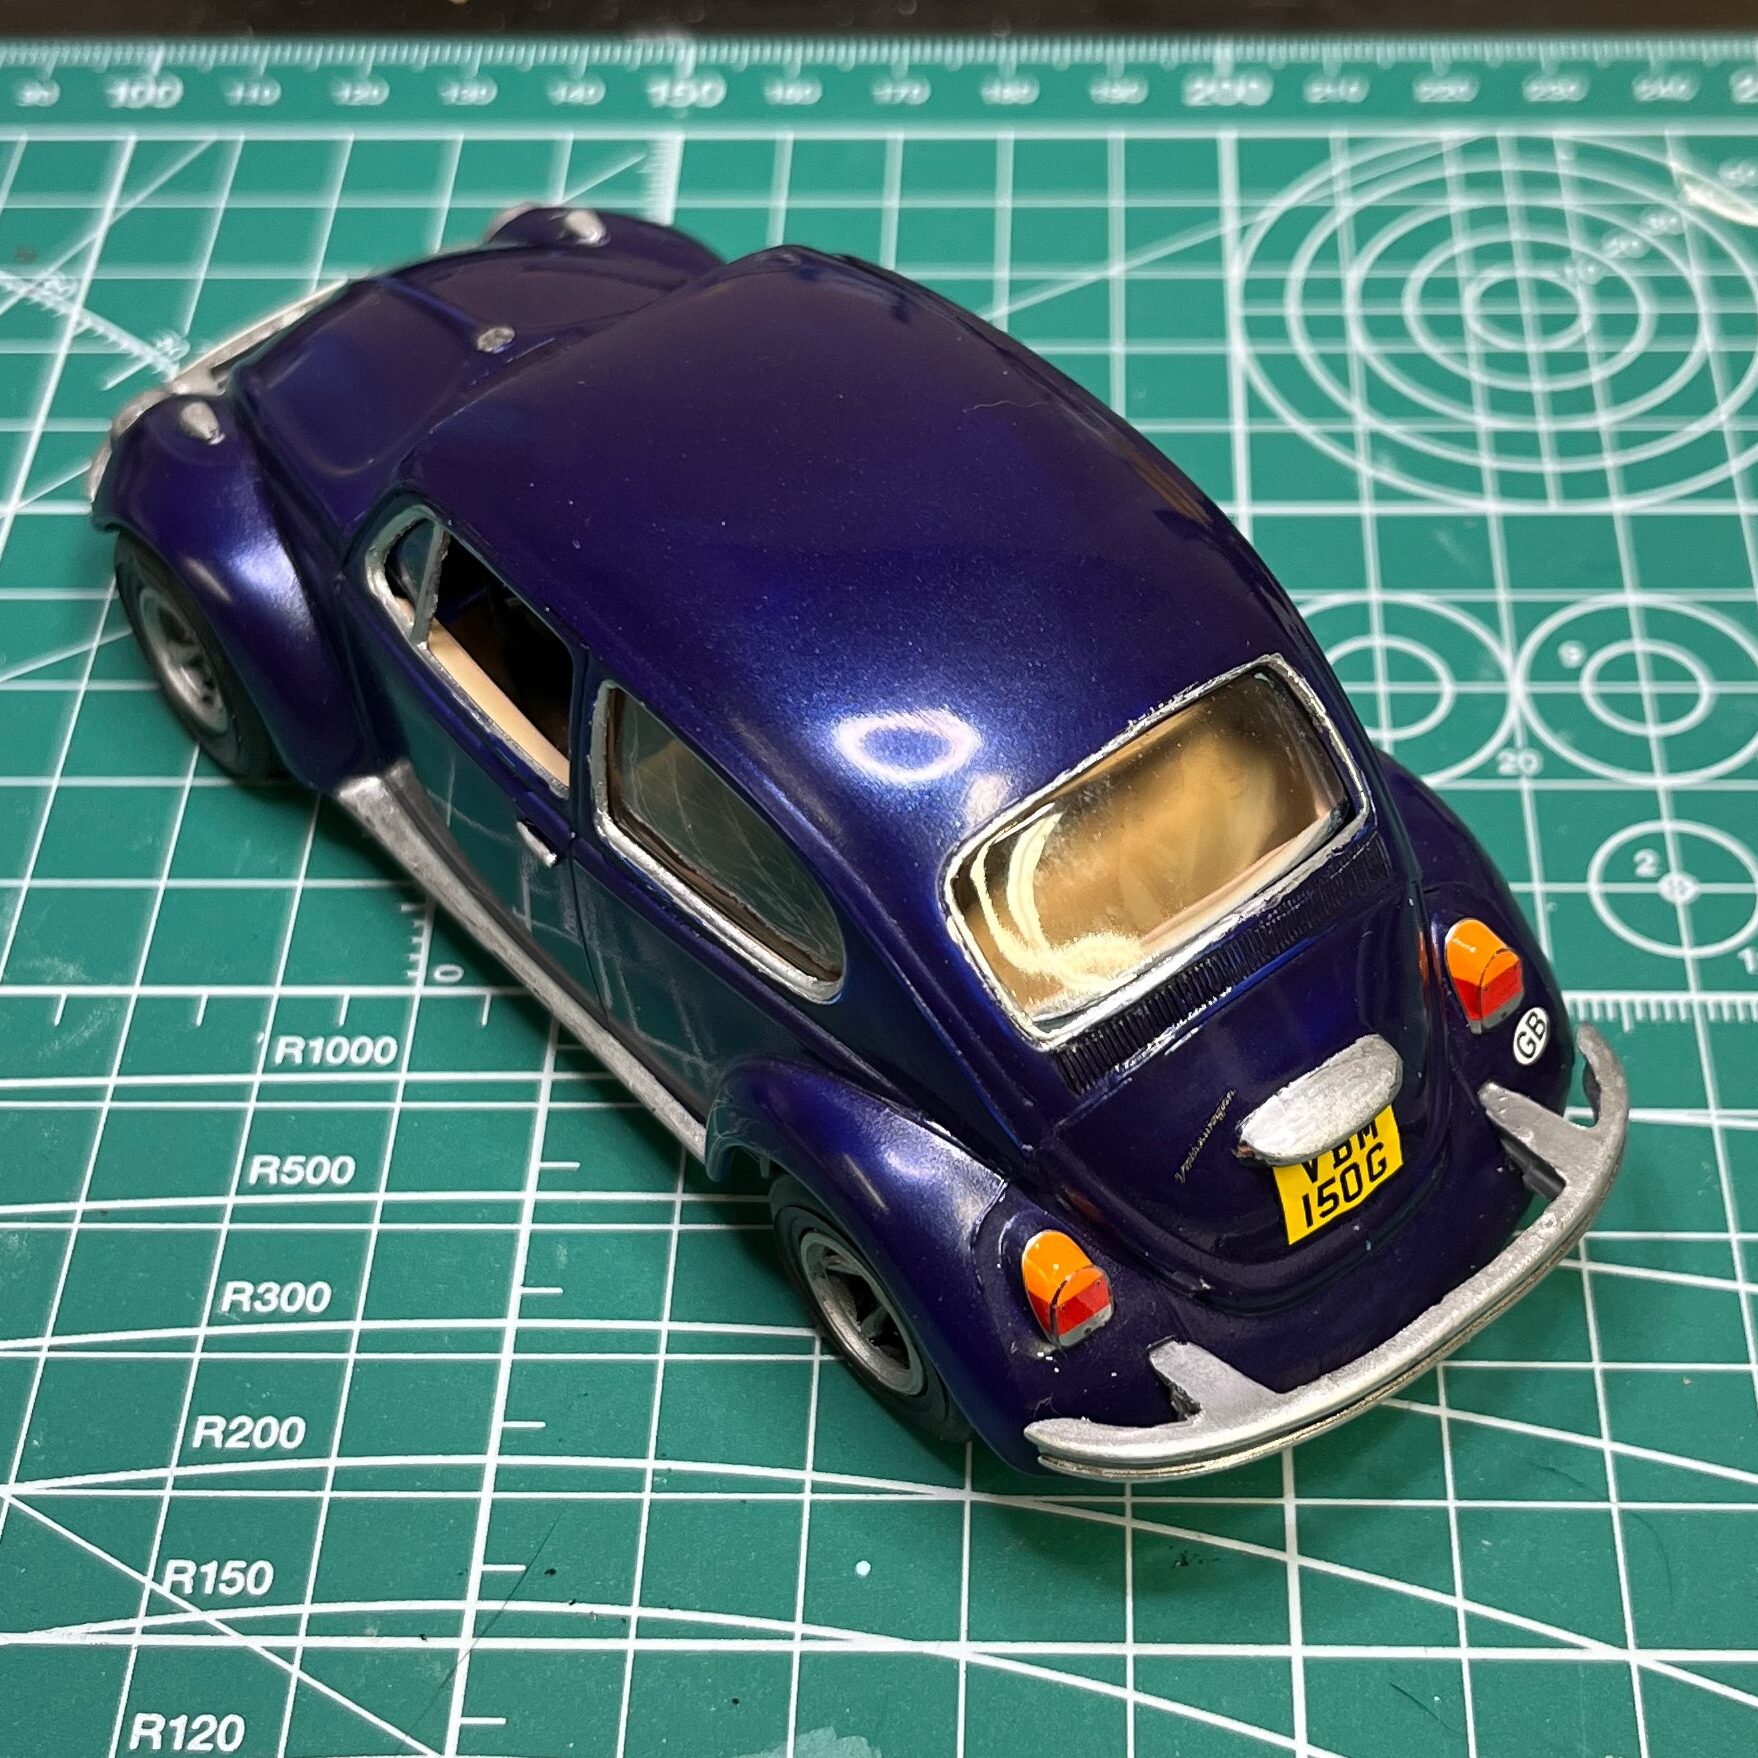
It took several coats, with wet-sanding in between, but eventually that pre-shading actually became much more subtle, and I got an outstanding shine. All in, I’m pretty happy with how the paint-job turned out.
Once the paint had dried, I assembled and painted the details in silver by hand with a very fine brush. For a cheap practice model, I’m pretty happy with how this turned out.
In addition to the practicec with the air brush and polishing the paint, I also tried a couple of experiments on getting a carpet texture on the floor. I used some sand/powder stuff that I found at Michaels and sprinkled it over some white wood-glue diluted a bit with water. At this scale, this gives a fairly believable carpet look.
Unfortunately I don’t have any photos of the interior showing how the carpet looked. But all in all, it was a pretty successful practice run! Not bad for just a quick practice car.
There were a couple of places where I noted that I could have done things better. First, the sand-powder stuff (not sure the name), has a bit of a sparkly look, being sand. Next time round, I would have painted it. Also, the wet sanding the paint was a lot of work. I think I will try using a varnish going forward and sand that instead of the paint itself. The wet-sanding helped get the gloss, but it also took the paint down to the plastic in a couple of places.